Quickstart
This guide will get you all set up and ready to use the Superagent Swift. We’ll cover how to get started the SDK client and how to make your first request.
Before you can make requests to the Superagent API, you will need to grab your API key from your dashboard. You find it under APIKey.
Add the SDK to your application
Before making your first request, you need to add the Superagent Swift SDK ass a package to your app. In the following example, you can see how to install it.
Install the package
-
Go to your Xcode project and select
File > Add Package.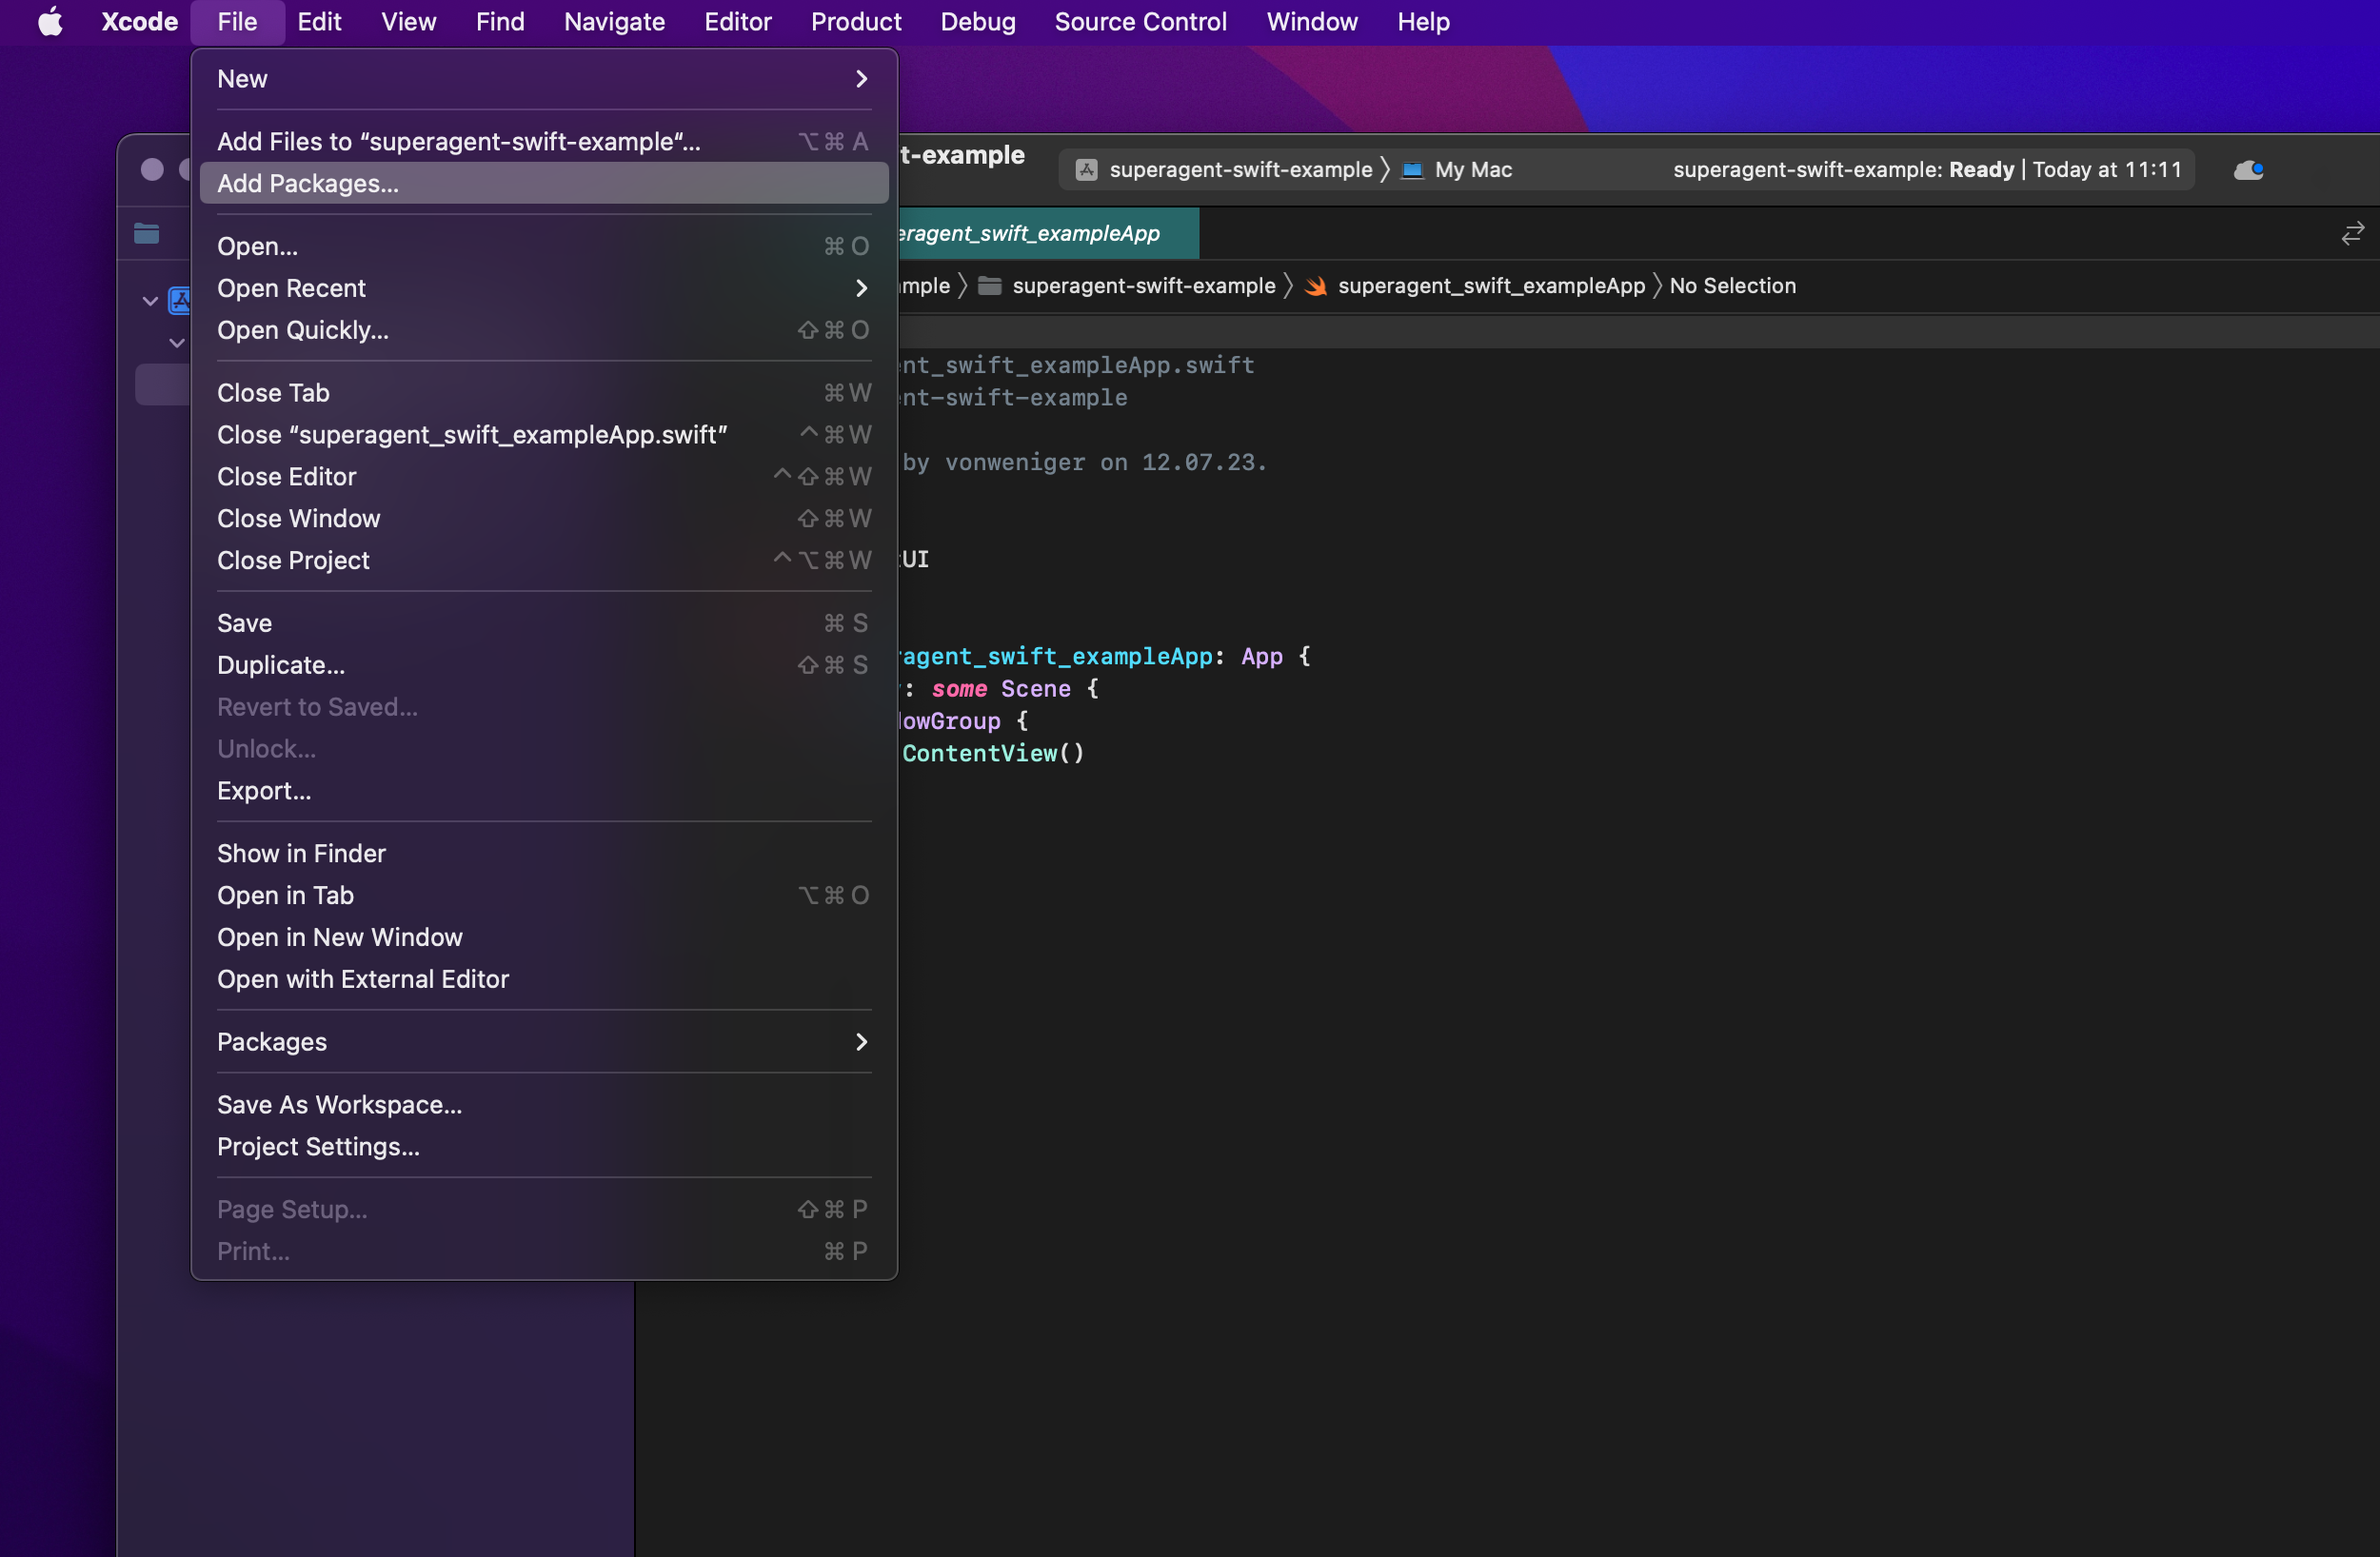
-
Enter the package repository URL:
https://github.com/simonweniger/superagent-swiftinto the search. -
Select Up to Next Major Version.
-
Click
Add Package.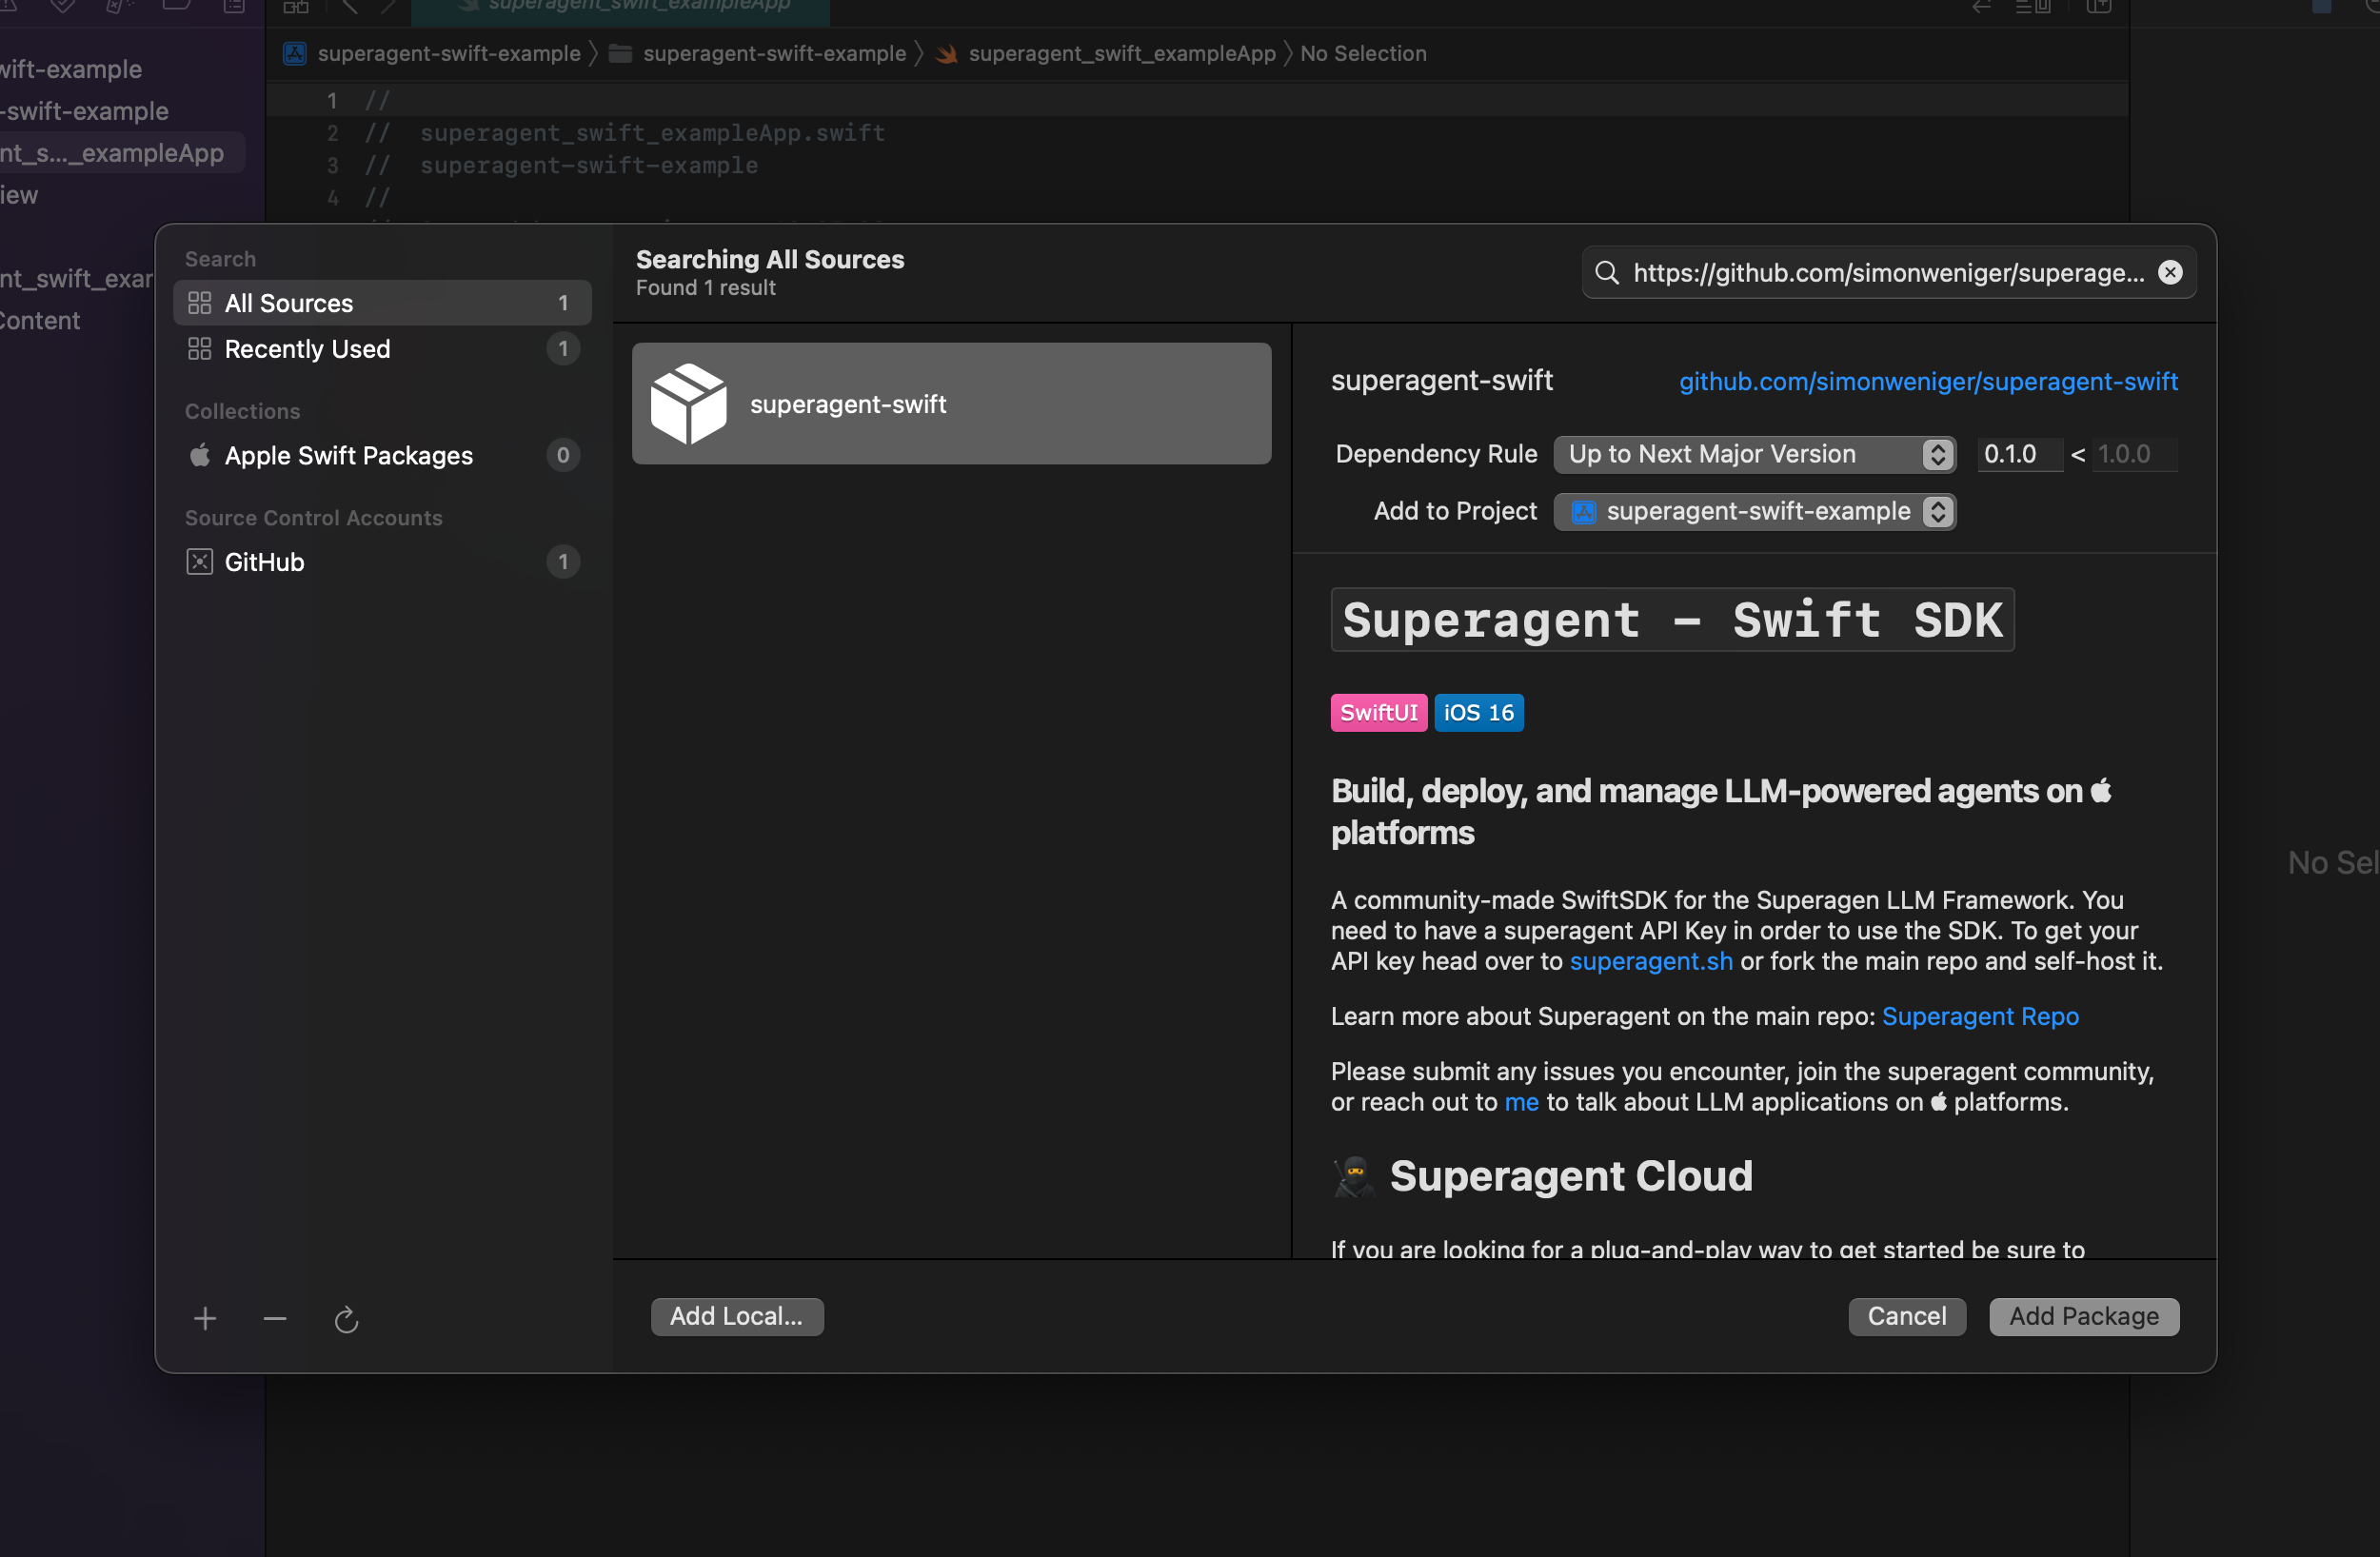
Initialize the SDK
After adding the Superagent Swift client, you are almost ready to make your first call to the Superagent API. But before we can start making requests we need to initialize the SDK with our API credentials.
CreateAgentView.swift
import Superagent

let superagent = SuperagentSDK(apiKey: "mysuperagentkey")
It is recommended to store your api key in a seperate file to have one source of truth, as you may have different locations in your project where the SDK gets initialized.
constants.swift
import foundation

struct Constants {
    static let SUPERAGENT_API_KEY: String = "yoursuperagentapi"
  //...other constants
}
The file where you use the superagent SDK would then look like this:
CreateAgentView.swift
import Superagent

let superagent = SuperagentSDK(apiKey: "mysuperagentapikey")
Create your first prompt Tamplate
After we have initialize the SDK we can start use its functions to make api calls to superagent.
For the purpose of this quickstart we created a new project with a CreateAgentView. Inside of the CreateAgentView class we create a new function with the name createPrompt().
CreateAgentView.swift
import Superagent

let superagent = SuperagentSDK(apiKey: "mysuperagentapikey")

class CreateAgentView: View {
  func createPrompt() async throws -> String {
    let newPrompt = Prompt(name: "My prompt", inputVariables: ["question", "history"], template: "My prompt template with {histroy} and {question}")
  }
}
The Prompt Model has the following values which are required to create a new Prompt.
- Name
name- Type
- string
- Description
The name of the prompt.
- Name
inputVariables- Type
- arrray of strings
- Description
A
String arraycontaining input variables.
- Name
template- Type
- string
- Description
The prompt template.
Here is an example response from Superagents API.
Create agent response
{
  "success": true,
  "data": {
  "id": "cli28c2vd00016itbrlhekwql",
    "name": "My prompt",
    "template": "...",
    "input_variables": [
        "question",
        "history"
    ],
  }
}
We submit our prompt with a simple do/catch where we use the createPrompt function from superagent. After that we print the response as well as the name and id to the console.
As you see you can access all properties from the response data via their Key. For example prompt[name] for the name of the prompt. This is the case for all functions from the Superagent Swift SDK.
CreateAgentView.swift
import Superagent

class CreateAgentView: View {

  let superagent = SuperagentSDK(apiKey: "mysuperagentapikey")

  func createPrompt() async throws -> String {
    let newPrompt = Prompt(name: "My prompt", inputVariables: ["question", "history"], template: "My prompt template with {histroy} and {question}")
    do {
      let prompt = try await superagent.createPrompt(prompt: newPrompt)
      print("Create prompt result: \(prompt)")
      print("Hi I am promt \(prompt["name"] ?? "none") with the ID: \(prompt["id"] ?? "none")")
      } catch {
        print("Error when creating prompt: \(error)")
        throw error
      }
  }
}
Create your first agent
We have create a prompt tamplate that we wanna utalize to create an agent.
So let's create our first agent! Now we create a new function inside of our ContenView called createAgent().
In you application you probanly want to creae your own function with user inputs in a view model instead.
Under the createPrompt() function, inside of the ContentView we create agent variable that initalizes a new agent based of the agent model from Superagent. Here we are using the prompt id we got from the createPrompt() function. In your application you will probably have one of three cases:
- You wanna pre create prompts. Therfore I would recommend using the Superagent dashboard and hardcode the promptId.
- You wanna let your users create a prompt. In this case I would store the prompt response in in your db and fetch the user promptId from there.
- Your users always create Agent and prompt together. If this is the case you could have a crateAgent() function with the required inputs and then first create the prompt and then create the agent all in the same function.
But in our case for this quickstart tutorial we simply assume you pass in the promptId from a variable or db.
CreateAgentView.swift
import Superagent
//... other code
class CreateAgentView: View {
  //... after the create prompt function
  func createAgent() async throws {
    let newAgent = Agent(name: "My first Agent", type: "OPENAI", llm: Agent.LLM(provider: "openai-chat", model: "gpt-3.5-turbo", apiKey: ""), hasMemory: true, promptId: promptId)
  }
}
The Agent Model has the following values which are required to create your first Agent.
Agent Model
- Name
name- Type
- string
- Description
A name for the agent
- Name
type- Type
- string
- Description
The agent type, valid values:
OPENAI,REACT
- Name
llm- Type
- LLM model
- Description
The large language model you want to use with the agent.
- Name
hasMemory- Type
- string
- Description
If the agent should have memory
- Name
promptId- Type
- string
- Description
A valid
promptId
LLM Model
The LLM Model is a child model of Agent which is required inside of the llm property of the Agent model
- Name
provider- Type
- integer
- Description
The LLM provider, options:
openai,openai-chat,anthropic,cohere
- Name
model- Type
- integer
- Description
The specific model you want to run, e.g
gpt-3.5-turbo,gpt-4,claude-v1etc.
- Name
apiKey- Type
- integer
- Description
Enter an optional API key if you want to use your own account for the specific LLM provider.
Here is an example response that shows what the Superagent API returns after you called the createAgent() function via the swift SDK.
Create agent response
{
  "success": true,
  "data": {
      "id": "clhjk4hab00016iewrghkbs28",
      "userId": "clhj28u1300006ig02ptpm1sh",
      "user": {},
      "name": "Test Agent",
      "type": "REACT",
      "llm": {
          "model": "gpt-3.5-turbo",
          "provider": "openai-chat"
      },
      "hasMemory": true,
      "AgentMemory": null
    }
}
Now we know what Agent we want to create. Its time to submit the request. Therfore we cerat a simple do/catch where we use the createAgent function from superagent.
CreateAgentView.swift
import Superagent

class CreateAgentView: View {

  let superagent = SuperagentSDK(apiKey: "mysuperagentapikey")

  func createAgent() async throws {
    let newAgent = Agent(name: "My first Agent", type: "OPENAI", llm: Agent.LLM(provider: "openai-chat", model: "gpt-3.5-turbo", apiKey: ""), hasMemory: true, promptId: "")
    do {
      let agent = try await superagent.createAgent(agent: newAgent)
      print("Agent result: \(agent)")
      print("Hi I am Agent \(agent["name"] ?? "none")")
      } catch {
        print("Error when creating agent: \(error)")
        throw error
      }
  }
}
What's next?
Great, you're now set up with the Superagent swift client and have made your first request to the API. Here are a few links that might be handy as you venture further into Superagent: